Wednesday, March 25, 2009

Having fun

I belong to a Yahoo group called CoveredCaboose. They deal mostly with wool and bamboo fabrics for diaper making; they also sell some really neat knits and other fabrics. In addition, the group Mom has a pattern line called Ditto Daddy. I bought one of the patterns last week and made Little Miss A, my up-and-coming granddaughter, some new onesies. These are made specifically for babies who are cloth diapered. The name, fittingly, is Ditto Daddy Cloth Bum Onesies.

If you look, the snaps for the crotch aren't in the middle of the bottom. Now that place is hard enough to snap on babies wearing paper and plastic and petroleum diapers. There's a fullness to a diaper that doesn't lend itself to being squashed in the most abundant part. Oh no; these onesies snap up on the tummy, over the big mushy soft fluffy cloth diapers keeping the baby comfy and feeling all fuzzy. I have a snap press, like several other cloth diaper making people, and it makes applying the poly resin snaps much easier, not to mention a whole lot more fun because of the color variations and possiblities.

The tummy snap area, as well as the crotch one, is reinforced with my special blend of little pieces of fabric that allow stability while keeping the snaps from being pulled away from and possibly out of the fabric with repeated usage, which anyone who has ever diapered a baby knows their clothing gets a lot of.
So anyhow...I think this is my favorite pattern. I'm glad I bought it. The pattern itself is a little odd-looking at first but it explains itself fabulously well once you get going.
I will be using it again.

Now this dress is made from a Simplicity 50's retro pattern. It is also for Little Miss A, hopefully on her homecoming day (per Oma tradition). Before anyone thinks it - yes, I did put the snaps bottom side out. I happen to adore those little butt-ruffles and want to see all of them. The flat front is not as interesting as the ruffles, and little girls in ruffled diaper covers look absolutely adorable. The bonnet went together in a snap. I was really surprised at how easy it was to make. Actually, the whole pattern was pretty easy.


Here's a pic of the back of the dress and the whole lilac part of the diaper cover, which, by the way, is lined with Kona Snow fabric as is the bonnet, and the cover contains a hiddlen layer of PUL in case of leakage. Nothing like baby surprises on your Sunday best.

I also reinforced the snaps for the diaper cover with a layer of thick fabric so that they are stabilized and stronger. I don't want to take any chances.
I can't wait to see how son and his girlfriend like this outfit. They love the onesies. Nobody else will ever have one just like this one because it is made by an individual for an individual. No mass-produced BigBox dress-in-a-bag thing for my granddaughter. I try as much as I can not to support the proponents of a legal form or persecution almost to the point of slave labor all so that Americans can indulge their greediness and apathy for the people on the other side of their poor-quality cheaply abundant cookie-cutter possessions.


And enough of that.


The chickens have about had IT with the rain. They want spring and warm, not this weird weather we're getitng with cool and damp, warmer and damp, cool and damp, warmer and damp. We all get kinda cranky around those months when it's not winter any more but it's not spring either. I need to get my garden in, need to prune and rake as much as I can, and I need to paint the awful nasty stained inside of the chicken coop. I learned a lot this past year about what chickens can do with poop while they are sleeping. It ends up in the **strangest** places!!! Hubby is working more on the chicken coop. He finally got me another door at the other end of the run so I don't bonk myself in the head so much. I like this door. If it were a bit taller it would be nice, but you're not going to hear me complain.

Well, it's time to get going again. God's blessings on your and yours. Peace to you.

Tuesday, March 17, 2009

Drawstring elastic application - method 2 of 3

Note: To see a bigger photo, click on the one in the entry.

As in method #1, once you get your garment assembled, finish the top edge. For this pair I used a rolled hem - I was playing with my new serger. You can do this, fold over a small amount and straight stitch it, use an overlock stitch, or use a zigzag stitch; whatever you are most comfortable with is fine.

Take your drawstring elastic and cut it your waist measurement minus enough for the elastic part to be comfy, generally 6-8 inches. This, however, varies with your size. Pull out 3-4 inches at each end and knot off to prevent them slipping back inside the elastic. Once you have done this, measure the width of the elastic and then go over to the garment. Using a ruler, measure 2 times the width of the elastic plus 1/4 inch and mark a spot on the fabric with a disappearing marker in a color dark enough for you to see.

Using the ruler and marker, continue to mark this same measurement all the way around the waist of the garment about every 3 inches. Again, use a washable or disappearing marker and make the lines dark enough for you to see.

Lay the garment flat on your work surface. Using the ruler and marker, connect all the lines you have drawn so far to mark the sewing line for the casing. Make the marking dark enough to see because you will be using this line in a while.

Here is a picture of the line drawn all the way across the fabric of my lounge pants. It's not very dark in the pic but it was clear enough for me.
NOTE: As an alternative, if you don't have a water soluble marker, you can use straight pins to mark your seam line. Don't necessarily run out and buy one if you're only going to use it this one time. I've used pins myself several times and they worked just fine.

Measure the how far up from the bottom of the elastic the drawstring is located. At the center front seam of the garment, go to the bottom line and measure that far up from it. With a dark marker, make a little hash mark on the outside of the fabric to indicate where the buttonholes should be located for the drawstring.

Cut two pieces of fusible interfacing about 2 inches by 2 inches and iron them to the back side of the garment close to the center seam and slightly below the mark for the buttonhole. This will strengthen the fabric in the area where you will be using the drawstring to adjust the waist of the garment.
Make the buttonhole, sewing on the front side of the fabric and using a 1/2 inch button to guide the size of the hole as indicated in the previous method. Use the pins across the ends to provide a guide to safely and gently cut the buttonhole open.
Once the buttonholes are sewn and cut open, fold the top of the garment down and pin it so that the edge lies along the line you drew all the way around the waistline earlier. Leaving an opening in the front of the garment to feed the elastic through, sew a straight line between about 1/4 inch from the finished edge of the fabric. If you'd rather, you can do an elastic stitch or regular zigzag stitch and just guide it to secure the edge of the fabric to the garment. The opening for the elastic should be about 1 to 1/5 inches on each side of the center front seam depending on the width of the drawstring elastic you will be using.

Once the casing seam is sewn, take the drawstring and turn it bumpy side down so the side facing you is smooth and the sewing that encases the drawstring isn't visible. Keeping the bumpy side dwon, take a safety pin or other elastic guide and feed the elastic through the casing, taking care to secure the end that is not being guided though so that it doesn't slip into the casing. You need about 3 inches of each end of the elastic outside the casing in order to finish sewing it.

After the elastic is threaded through, you need to put a piece of fabric the width of the drawstring elastic and about 4 inches long behind the elastic so that you can sew the elastic part together. I use a piece of interfacing or scrap fabric. This stabilizes the seam and also gives you a little more protection while you are sewing since the elastic stretches and will get all out of shape. Using a zigzag stitch, start at one end of the supporting fabric and go all the way to the other end. Turn and repeat twice, stretching gently so that the portion of the elastic being sewn doesn't have the feel of being all stretched out and having lost elasticity. Do this stitching on the bottom and top of the elastic, making sure not to catch the drawstring into the stitching line while you're doing it.

After the elastic is secured, feed the drawstring through the buttonholes and adjust the drawstring elastic inside the immediate area of the casing so that the joining area of the elastic is between the buttonholes and the drawstrings are directly behind the buttonholes. To secure them for the moment, use a straight pin or safety pin and fasten the area with the pins so that it doesn't slide around.

Once the drawstring is through the holes and secured, tie it in a loose knot. This is yet another way to make sure things stay the way they should be. After you tie the knot in the drawstring, take the pins loose so that you can fit the elastic into the casing. You can secure the area between the buttonholes if you wish to by pinning the elastic into place - again, this keeps it from sliding around while the garment is finished.

Take hold of the garment and stretch the casing, working it until the elastic disappears into it. It should not show outside the area that is open. It might take some work depending on how well you made the casing. If it is just a bit tight, it will require extra maneuvering to work the elastic/drawstring combination into the casing. If it is a bit too wide, you may have to deal with the elastic flipping over upside down, at which point you will have to work it back around so it's facing the same direction all the way through the casing.

Now that the elastic is all located inside the casing where it belongs, you can pin the opening in the casing closed and stitch across it with a simple straight stitch, either lock-sewing or backstitching at either end to make sure the thread doesn't unravel. When that is done, turn the garment around and untie the drawstrings. If you wish, you can sew a line up and down where the drawstring and elastic meet to keep them where they belong. However, if you don't want to, it's not a big deal.

All done!

Monday, March 16, 2009

Applying drawstring elastic, method 1 of 3


Once you have assembled the bottom of your pajama pants, boxers, lounge pants, or skirt, the next thing you do is to prepare your drawstring. Measure your waist and subtract 8-10 inches depending on how snug you want the waist to be. Of course, as your size goes down the amount you subtract decreases - otherwise for babies there wouldn't be enough elastic to put in the clothes. Pull out the drawstring 3-4 inches from each end and tie a knot. Set the elastic aside for a minute or two.

Using a serger, a zigzag stitch, or folding over a small amount and then stitching a straight seam, finish the raw edge of the waistband. Take your elastic and fold it in half end to end. Lay it across the back of the fabric at the seam line below the finished edge. Fold the fabric down past the upper edge of the elastic by 1/4 inch to match the far side of the finished part of the fabric. Repeat in the center front of the garment.

Repeat the folding process. Pin through the outermost layer in the back at the bottom of the folded area so you know how far down you are going to be sewing. Now, before it is too late, slip the garment on and make sure the room you allotted for the waistband leaves you enough room to pull the garment on and be comfortable sitting down. If not, you are going to have to use a more narrow elastic or choose another drawstring option that will be discussed later.

In the front, first mark the bottom of the elastic like you did with the back. Now unroll the elastic and fabric and lay the elastic bumpy side up on your cutting surface. Cover it with the fabric, aligning it with the pins marking the bottom location of the elastic.

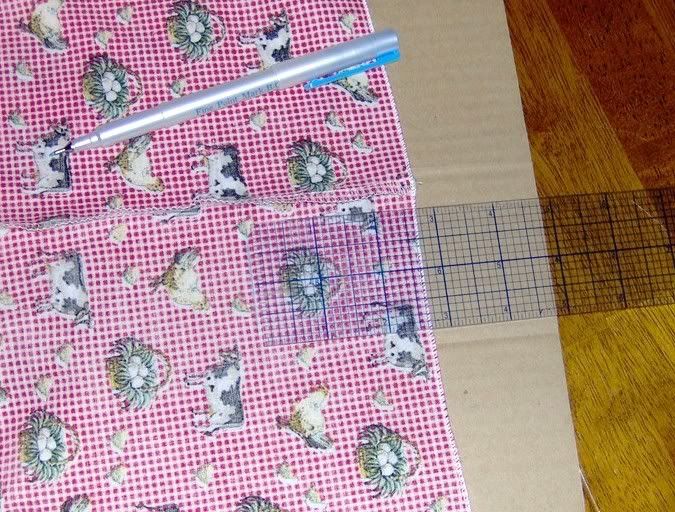
Now, move those pins or use other ones to mark where the drawstring is located on the elastic piece in relation to the fabric, getting within 1/2 inch of the center seam. Keep the pins as even as possible. This will be the location of your buttonholes for the drawstring. After this is done, you can remove the pins marking where the bottom of the elastic goes in the front since the buttonholes will help you keep it in place later on.

Choose a button about 1/2 inch across for the buttonholes in the garment to give the drawstring somewhere to come out and be adjusted. If you have an automatic buttonholer or even a regular buttonholer in your machine, this part will be nice. However, it can also be a labor of love by hand; I once made a dress for my daughter with 15 buttons going down the front and I hand-stitched every single buttonhole because my machine at the time didn't have a buttonholer.

Cut two pieces of medium weight fusible interfacing to stabilize your fabric. Each piece should be about 2 by 2 inches. This helps the buttonholes not get torn from the use of the drawstring to adjust the garment.

Apply the interfacing per package directions to the areas marked by the straight pins close to the center front of the fabric. Most packages direct you to dry iron the interfacing first, and then steam or damp iron it to the fabric to help it become permanently attached to the fabric and keeps it stable while you sew on it. Once the interfacing is applied, make a buttonhole on both sides of the fabric where previously marked. Try to keep as close to the seam as possible.

Once the buttonholes are sewn, remove the pins that were marking the buttonhole location. Now, very close to the edge of the unsewn center space on the top and bottom, put a straight pin to act as a stopper for the seam ripper. Do this on both sides of the center seam, marking both buttonholes that have been done.

Gently and carefully insert the tip of the seam ripper into the unsewn center space of the buttonhole as sewn, with the blade pointing up and down. Slowly cut the fabric along the length of the buttonhole, stopping when the guide comes into contact with the straight pin you put in as a guide. Once you get one end cut, turn the garment around and repeating this for the other end of the first buttonhole and the entire second buttonhole. When finished, remove the straight pins and put the seam ripper away.

Now that the buttonholes are cut, it is time to work on the drawstring elastic. The first thing you do is to fold the elastic again from cut end to cut end and mark the center with a straight pin or marking pin. After that is done, fold the end of the elastic into the center on both ends and mark the center of that with a pin or marker. This is called "quartering" the elastic and is useful for making sure the elastic is at least close to being applied in the proper proportions while being sewn. When you are done you should have 3 straight pins and two open ends on the elastic, ready to be applied to the fabric.

Choose a zigzag stitch for applying the elastic or, if you have it available, a zigzag lightning stitch. This stitch is interrupted several times, increasing the elasticity of the waistband while not losing integrity. If not, a medium-length and medium-width zigzag stitch is fine. On my machine, that setting is 2.5 for width and 3.5 for length.

Line the elastic edges up to the near part of the finished edge of the waistband, with the bumpy part of the elastic against the fabric. Starting in the middle back, pin the elastic to the fabric at the seams with the straight pins that were used to mark the fabric earlier, matching the pins that quarter the elastic to the pins in the fabric. You will notice the elastic is more tight than the fabric and that is okay because you're going to be stretching the elastic to fit the fabric. Use the same method to align and pin the elastic to the fabric at the remaining seams. In the middle, where the buttonholes are, you will meet the elastic edges to themselves but do not pin one over the other or in any other way hinder the movement of the drawstring.

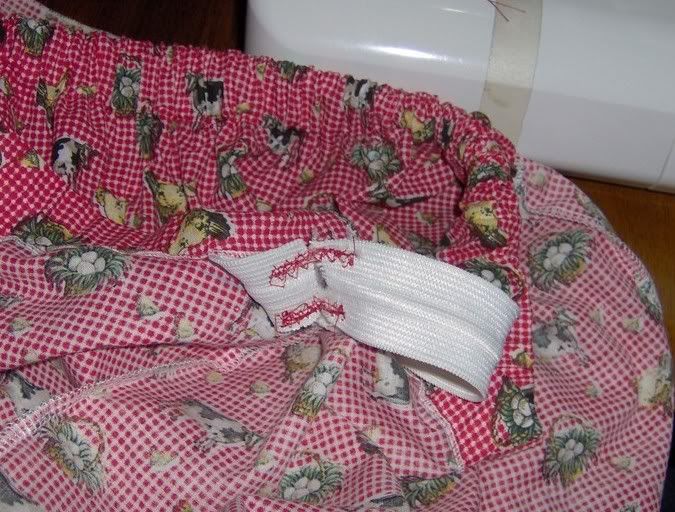
Ok. Now we get to a bit of a tricky spot. Taking the elastic and fabric in hand, beginning at the part where the elastic is cut, sew several stitches through the elastic and fabric on the side opposite the finished edge of the waist without stretching to secure the elastic and thread to the fabric. Make sure for this entire section that every time you stop sewing the needle is DOWN in the fabric so it can't move around, or you are going to have a big mess. Next, take a deep breath and stretch the elastic between the part you just sewed and the first straight pin beyond it. If you need to, grab it in the middle to steady it a bit, and sew along the line furthest from the finished edge slowly and carefully until you get all the way to the pinned spot. Put the needle down. Stop and take a break. After a minute or so, use the same technique to do the next spot, and so on until you have that entire side of the piece of elastic sewn to the fabric. Make sure when you are done to oversew and then either 1)backstitch or 2)do a lock-stitch at the end so the thread doesn't come unsewn.

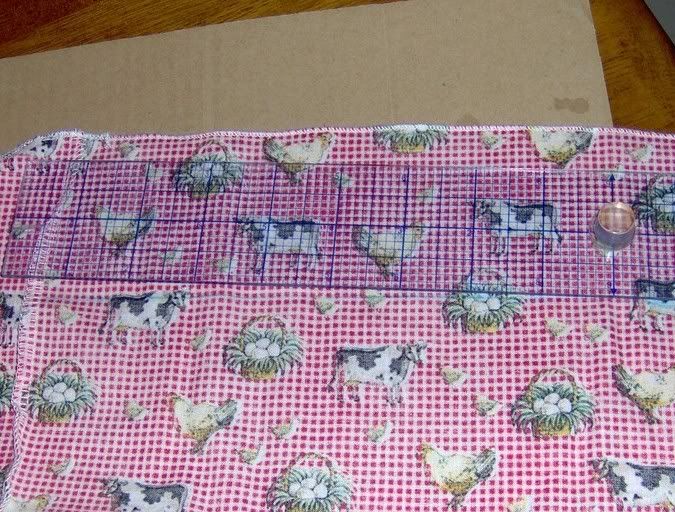
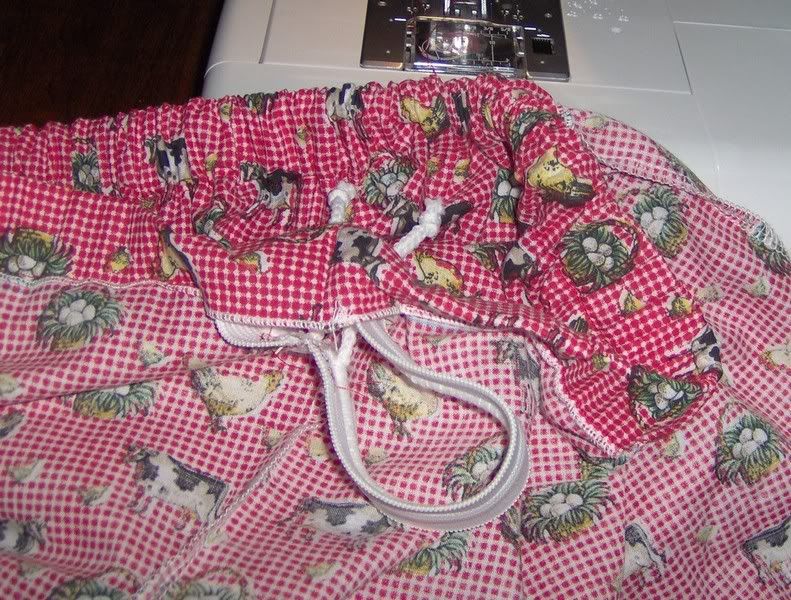
This picture shows the elastic being sewn edge to edge along the stitching line. You may want to sew over this a couple times, at all times being careful not to catch the drawstring up into the sewing. Don't be too worried about how it looks because this will be on the inside of the garment and not too many people will see it. Your technique will improve with time and practice.

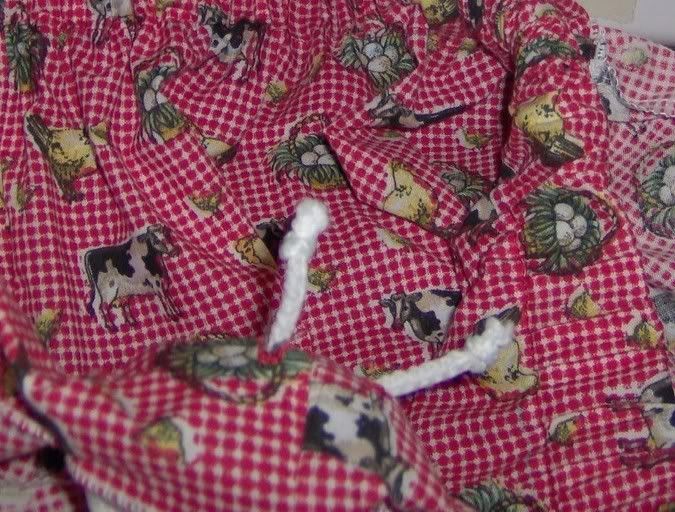
Before sewing the last bit, you need to pull the two ends of the drawstring through the buttonholes, tie them, and pin them out of the way so they stay free while you sew. Make sure that you line up the elastic so that it is pinned end to end without overlapping or in any other way impeding the drawstring from functioning freely. If you are sewing with a knit, you will want to pin the fabric in several places after you fold it so that it doesn't get all stretched out of proportion while you're doing this last seaming. With woven fabrics it isn't quite as necessary but can still be done.

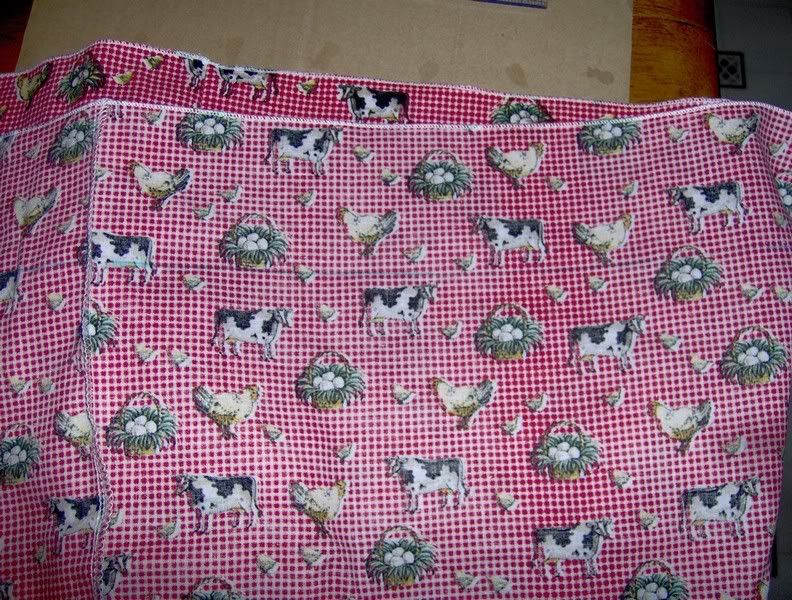
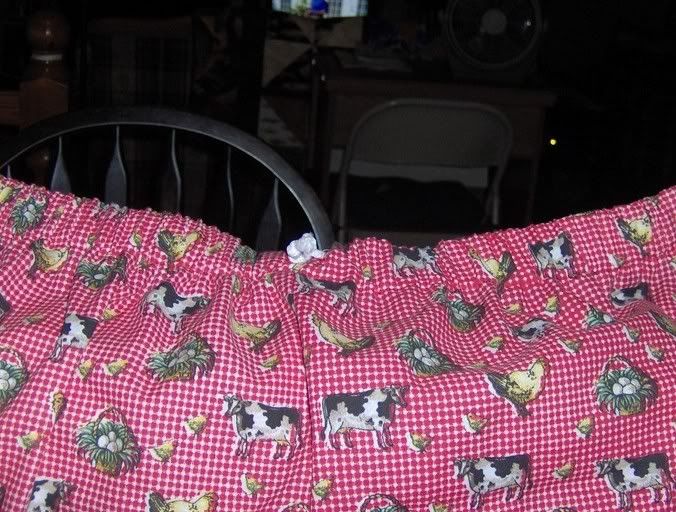
Here is a picture of the first row of stitching done with the lightning zigzag stitch. The fabric hugs right up to the elastic and one the nicest effects is that it will not roll or slide around inside the casing like free-floating elastic will.

Before you sew the last seam around the bottom of the elastic waistband, make sure the drawstring is still tied and pinned out of the way so it doesn't get caught up in the sewing. There's nothing worse than having to use the seam ripper to pick sewing thread out of a piece of drawstring.

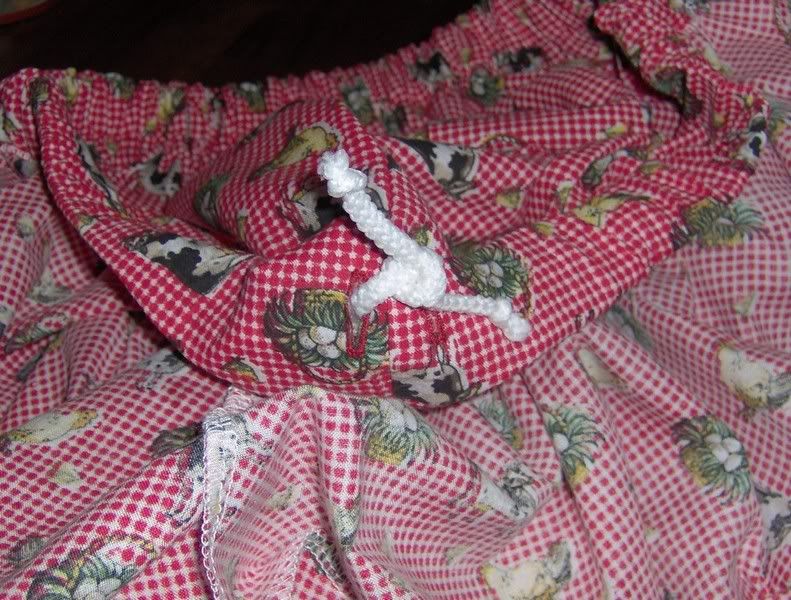
Going slowly to keep the seam and stitching line as even as possible, stitch through the fabric and elastic right above the finished edge of the waist of the garment. Try to keep the lower edge of the seam even with the upper edge as much as you can, but don't demand perfection the first time you do this. Reinforce the area where the elastic is joined end to end to keep it from sliding around.

Now that the seams are done, and everything is in place, make sure all the pins are removed and all your supplies are put away. Now, take the garment and untie the loose knot you put in the drawstring and replace it with a bow. If the garment is for you, try it on and make sure it fits correctly. Don't wait till it comes out of the washer and dryer before you check to see if you need to remake it.

These last two pics are what I call success pics. They show the pajama or lounge pants I made, all done, ready to go in the washer for one last trip through before they go into the lineup in my dresser. I know they won't be the only pair there, but they were the first I made in this manner; I am pretty sure they won't be the last.
Please feel free to email me if you need any help with yours or to give me feedback about this tutorial or any other one in my blog, especially since many of them were written in the middle of the night.